What is upcycling and why now?
How to Upcycle Clothes? The answer is: upcycling means transforming garments you already own (or secondhand finds) into higher‑value pieces without breaking them down into fiber, making it the fastest way to extend a clothing item’s life and reduce waste.
Upcycling differs from recycling because you keep fabric intact and redesign it into something better—think a shirt turned into a skirt, a sari into a kimono jacket, or jeans into a tote—so you save energy, time, and money compared to industrial processes.
This matters now because fashion waste is massive and growing, while the resale and circular fashion movements are booming, which makes How to Upcycle Clothes a practical way to take action at home and still stay stylish.
Over years of hands‑on projects and work with local tailors, one clear truth stands out: simple, repeatable methods beat complex ideas you never finish, so it’s better to “ship” a basic transformation today than plan a couture‑level refashion for months.
Creators on YouTube and sewing communities have made upcycling easier than ever with step‑by‑step formats, seasonal projects, and no‑sew hacks, so you can start small, get quick wins, and build confidence over time.
In India, the tradition of repair, alteration, and re‑stitching with local tailors (darzis) aligns naturally with upcycling—so you can blend modern tutorials with familiar practices like resizing a kurta, adding a border to a dupatta, or piecing patchwork from family saris.
Mini story: a college student took a faded men’s shirt from a thrift pile, cut it into a boxy cropped top, added a contrast pocket from a scrap dupatta, and wore it to class the next week—no sewing machine at home, just fabric glue and neat finishing, and the piece became a signature look.
Quick definition you can use
- Upcycling: transforming an existing garment into a better, more useful, or more stylish item without fiber breakdown.
- Recycling: turning clothing into fiber or raw materials for new textiles.
- Repair/mending: restoring function or aesthetics with minimal change to the original design.
What are the real benefits and trade‑offs?
The answer is: upcycling saves money, reduces waste, and gives you unique style, but it also takes time, planning, and basic skills you will build project by project.
On the benefits side, you get one‑of‑a‑kind pieces, custom fits, and seasonal refreshes without buying new; on the trade‑off side, you must learn simple techniques and accept that early results won’t look factory‑made—and that’s okay.
Environmental impact is immediate: every garment you upcycle skips the landfill and delays new purchases, which compounds if you make this a quarterly habit or turn it into a family or dorm challenge.
Financially, most first projects cost less than a café meal if you already have scissors, thread, and adhesive; even adding a tailor’s finish or a basic sewing machine pays back in a few projects.
Time is your key constraint, so use “one‑evening” builds like no‑sew tees, hem flips, and visible mending to stay consistent, then schedule bigger builds (denim patchwork, sari jackets) for weekends or holidays.
Mini case: a Pune couple turned two old denim jeans and a printed cotton shirt into a sturdy tote with lining and inner pocket; they used a neighborhood tailor for the final seam, which cost under ₹300 and produced a bag that easily replaced a store‑bought ₹1,200 tote.
Pros and cons in a glance
- Pros: low cost, low waste, unique style, skill growth, gift‑worthy results.
- Cons: time investment, learning curve, limited repeatability, tool needs as you advance.
- Mitigation: start with easy cuts and glue, finish with tailor services, practice on “sacrifice” pieces first.
How to Upcycle Clothes step by step at home
The answer is: to upcycle clothes, follow a simple seven‑step workflow—audit, pick a project, prep tools, test fit, transform, finish, and care—to move from idea to wearable result without overwhelm.
This beginner‑friendly flow keeps momentum high and avoids analysis paralysis, especially if you block 60–90 minutes for quick wins and reserve half‑days for bigger builds.
Use this sequence for your first three projects and you’ll unlock confidence while learning what styles suit your body, climate, and wardrobe.
How to Upcycle Clothes step‑by‑step (with time boxes)
- Audit your closet (15–20 min): pull 8–10 items you don’t wear—tees, shirts, dupattas, salwar bottoms, jeans—rank by fabric quality and sentimental value, then pick low‑risk pieces.
- Choose the right project (10 min): match item to difficulty—no‑sew tee crop, shirt‑to‑wrap top, sari‑to‑kimono, jeans‑to‑tote; start with one skill (cut, hem tape, or glue).
- Prep tools (5 min): sharp fabric scissors, chalk or pencil, measuring tape, pins or clips, fabric glue/hem tape; if sewing, add universal needle, thread, iron.
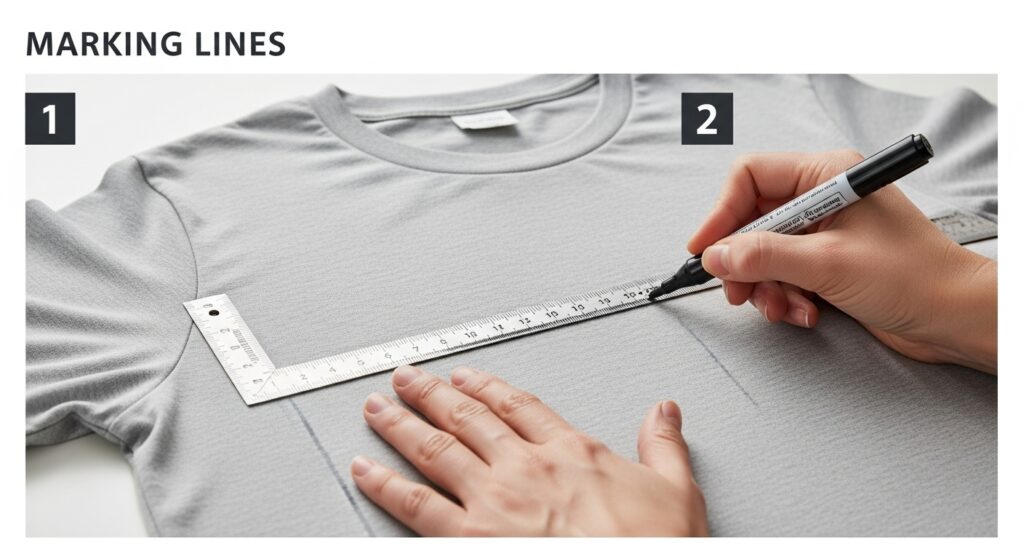
- Fit and mark (10 min): wear or pin on a mannequin; mark length, seams, and symmetry; always cut less than you think, then trim gradually.
- Transform (20–60 min): execute clean cuts, apply adhesive or basic stitches, press with an iron for crisp edges; keep a lint roller handy for cleanup.
- Finish (10–20 min): press seams, secure raw edges (zigzag, pinking shears, or bias tape), add closures (snaps, hooks, elastic), trim threads.
- Care and test (10 min): wash per fabric rules, then wear for a short outing to check comfort, mobility, and durability before longer use.
A simple sari‑to‑kimono example
Trim pallu for the collar band, fold edges with hem tape, add belt loops from scrap, and finish with a fabric tie; the piece layers over tees in summer and over turtlenecks in winter.
Which tools and materials do beginners really need to to upcycle clothes?
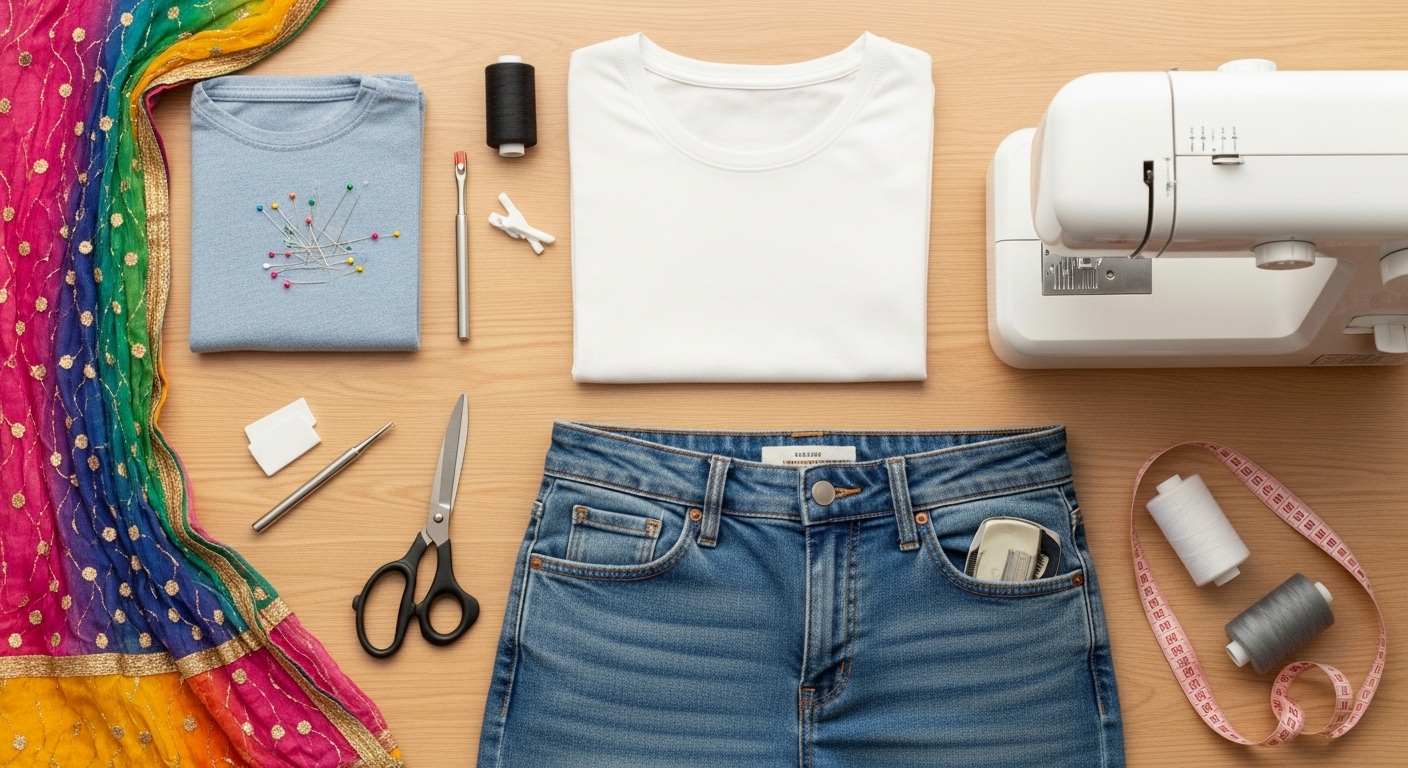
The answer is: you need only five essentials to start—fabric scissors, measuring tape, marking chalk, pins/clips, and fabric glue or hem tape—then add a basic sewing kit as you level up.
A home iron becomes your silent superpower because pressing edges and seams makes even no‑sew projects look polished, while a seam ripper lets you reclaim usable fabric and trims from older garments.
If you plan to sew, a simple machine with straight and zigzag stitches covers 90% of early projects; choose universal size 80/12 needles for light cottons and denim needles for jeans.
Essentials list (start small)
- Fabric scissors: reserve for cloth only to keep cuts clean.
- Measuring tape and chalk: mark hems, angles, and symmetry accurately.
- Pins or clips: prevent shifting and keep lines straight while cutting.
- Fabric glue or hem tape: quick bonds for no‑sew cuffs, hems, and appliqué.
- Seam ripper: remove sleeves, collars, or pockets neatly to reuse parts.
How to Upcycle Clothes with optional upgrades (when ready)
- Sewing machine: straight/zigzag stitches handle most garments.
- Needles and threads: universal for cottons, ballpoint for knits, denim for jeans.
- Pressing gear: iron with steam and a pressing cloth to avoid shine.
- Finishers: pinking shears, bias tape, snap kit, and elastic varieties.
Mini case: a Bengaluru student upcycled three tees into a color‑blocked gym tank using chalk lines, scissors, and fabric glue; a final press with a home iron gave store‑bought crispness, and a later visit to a tailor added a secure neckline for under ₹200.
What projects give the fastest wins (and which to avoid early)?
The answer is: choose one‑evening builds with simple geometry and forgiving fabrics—then avoid slippery silks, complex jackets, or tight fits until your basics feel automatic.
Fast wins keep motivation high and teach you core moves like measuring, cutting straight, finishing edges, and pressing for polish—skills that transfer to every future project.
For your first three, think “crop, wrap, tote”: crop a tee, wrap a shirt, and convert jeans into a tote; each teaches a different foundation skill without demanding patterns.
Start‑now picks
- Tee to crop and headband: measure torso, cut cleanly, fold and fix a micro hem with tape, use offcuts for a headband.
- Men’s shirt to wrap top: remove collar if needed, re‑angle hem, add inner tie plus outer wrap tie; great on poplin.
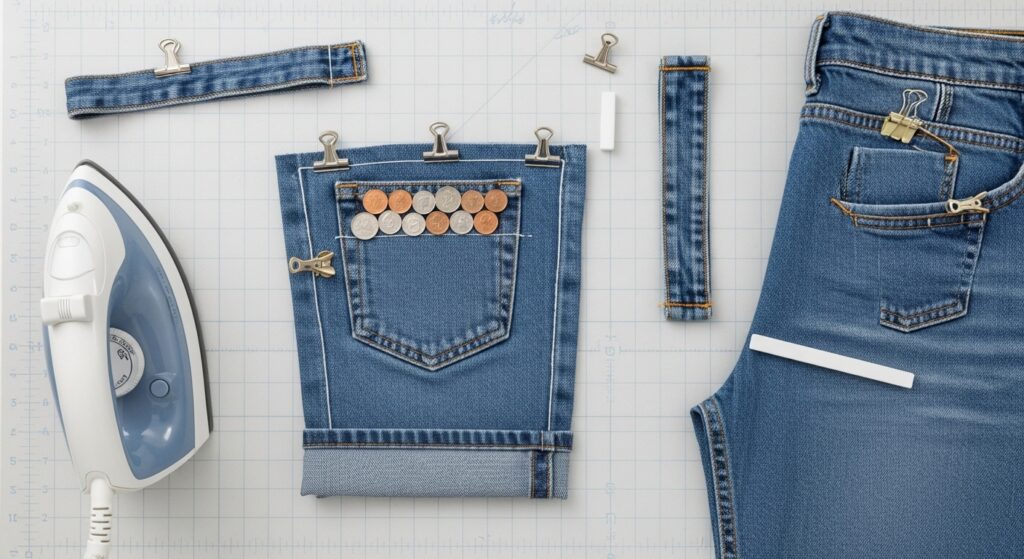
- Jeans to tote: keep leg panels intact, box the bottom, add a pocket from the coin‑pocket panel, and hem tape the top edge if you’re no‑sew.
Projects to delay
- Silk sari drape re‑cuts: slippery and fray‑prone; practice on cotton first.
- Blazers/jackets: complex shaping, interlining, and button stands.
- Tight body‑con fits: require precise patterning and advanced finishing.
Mini story: one Delhi learner tried a bias‑cut satin skirt first and struggled with slippage; switching to a cotton A‑line skirt from a printed bedsheet gave a wearable result the same evening and provided a pattern to attempt satin later.
How to Upcycle Clothes for Indian wardrobes and budgets
The answer is: lean into fabrics and garments common at home—cotton kurtas, dupattas, saris, denim, school or office shirts—and blend self‑work with local tailor finishing to stay under budget.
India’s fabric mix gives you wide latitude: cottons are forgiving and breathable, denim is durable for bags and aprons, and dupattas become overlays, scarves, or ruffles with minimal cutting.
To keep costs predictable, do design, cutting, and gluing at home, then pay a darzi for a single top‑stitch, elastic channel, or buttonhole so the piece lasts longer.
Indian garment ideas that just work
- Old kurta to co‑ord: crop the hem, use offcuts for an elastic waist short, and add contrast piping from scrap.
- Sari to temple jacket: cut a straight kimono body, bind edges with bias from the pallu, and add inner ties.
- Salwar to gym shorts: reuse the gusset panel as a comfort insert and add a fresh elastic waist.
- School shirt to apron: button placket becomes the front; add a deep hem tape pocket from the back panel.
Sourcing and saving
- Family closets: ask for “retired” saris, dupattas, and shirts with stains you can place away from focal areas.
- Thrift and export surplus: look for high‑quality cotton and denim; ignore size and chase fabric quality.
- Tailor collab: bring sketches or a reference photo; agree on a single finishing step and a flat fee.
Mini case: a Chennai professional turned a printed dupatta into a summer overlay with side slits, then added a narrow gold border from wedding scrappage; a local tailor top‑stitched the border for ₹150, and the piece became a weekly office staple.
What are the risks, mistakes, and safety tips?
The answer is: the main risks are cutting too much, choosing the wrong fabric for your skill level, and skipping pressing or edge finishing—each solved by testing on low‑stakes garments and moving in small steps.
Safety is simple: keep fingers clear when cutting, unplug hot tools between steps, and use a pressing cloth to protect delicate fabrics from shine or scorching.
Manage frustration by using a “sacrifice pile,” building a mock‑up from old bedsheets, and time‑boxing each step so you never rush critical cuts or seams.
Common pitfalls and fixes
- Crops cut too short: mark, try on, re‑mark, then cut—never freehand final length.
- Fraying edges: switch to a zigzag or pinked edge; bias tape cleans up visibly.
- Glue bleed: use parchment or cardboard under the fabric and apply thin layers.
- Uneven hems: measure from the floor, not from the waist—use two reference points.
Care and durability
- Wash gentle and air‑dry the first two times to test bonds and seams.
- Reinforce after wear—add a bartack stitch to stressed corners or a dot of glue to keep appliqués flat.
- Track what fails and why; your next project will bake in those lessons.
Mini story: one learner tried to reset sleeves on a denim vest and kept misaligning the cap; the fix was hand‑basting first, checking the hang, and only then machine‑stitching with a denim needle, which delivered a clean, durable finish.
How to grow from hobby to content or micro‑business
The answer is: document your projects with clear before‑and‑after shots, short vertical clips, and tight titles, then test simple paid offerings—custom alterations, denim totes, sari overlays—while standardizing finishes and care instructions.
If your goal is reach, copy winning formats from creator communities: seasonally relevant thrift flips, “finish my unfinished pile” challenges, and “one shirt, three looks” tutorials that educate and entertain.
If your goal is revenue, start with made‑to‑order items you can repeat, collect testimonials, and price to cover time, materials, finishing, and a buffer for revisions.
Content and packaging
- Video beats text for transformations—capture the cut, the press, and the try‑on.
- Use tight, searchable titles like “How to Upcycle Clothes: No‑Sew Tee to Tank in 10 Minutes.”
- Add checklists and care cards to every sale; it reduces returns and boosts reviews.
Quality and trust signals
- Finish raw edges consistently; if gluing, press and cure fully before delivery.
- Offer small fixes free in the first 7 days; it builds goodwill and repeat orders.
- Publish an “updated” date on tutorials, state whether links are affiliate‑free, and keep a simple alteration policy.
Mini case: a Mumbai creator sold 20 denim totes in a month by batching panel cuts from old jeans, outsourcing the final top‑stitch to a neighborhood tailor, and filming every step for social reels; customer reviews praised durability and deep pockets.
Conclusion: your 7‑day plan to start
The answer is: pick one garment you can risk, choose the simplest transformation, and finish it this week—then repeat with a slightly harder skill next week until How to Upcycle Clothes feels like a normal part of how you dress and shop.
On Day 1, audit your closet and select three candidates; on Day 2, watch two short tutorials and sketch your plan; on Day 3, gather tools; on Day 4, mark and cut; on Day 5, glue or stitch and press; on Day 6, finish edges and add closures; on Day 7, wear‑test and note improvements.
Start with a tee crop and headband, level up to a men’s shirt wrap, and then try a jeans‑to‑tote; by the end you’ll own three fresh pieces, three new skills, and a repeatable workflow that fits busy schedules.
If you’re in India, combine self‑work with tailor finishing to stretch quality while keeping costs down; borrow fabric from family closets, source high‑quality thrift cottons and denim, and avoid slippery silks until your hand feels steady.
Keep your momentum by tracking wins—a clean hem, a strong strap, a neat neckline—and learning from misses; use a pressing cloth, mark generously, and upgrade tools only after your first five completions.
When you’re ready, document your builds, post short “before→after” clips, and offer one repeatable product to friends and local buyers; standardize your finish, include a care card, and price for your time so the craft sustains you.
Above all, remember the spirit of this practice: How to Upcycle Clothes is not about perfection; it’s about creative problem‑solving, reducing waste with style, and building garments that carry your story forward—one small, satisfying project at a time.