Introduction: Why DIY Fermentation Kits Are Taking Over Indian Kitchens
Have you ever opened a jar of store-bought pickles and thought, “This could taste better—and be healthier”? You’re not alone. In 2025, the DIY fermentation wave is sweeping across Indian households, driven by a renewed interest in gut health, sustainability, and that magical, hands-on satisfaction of making something delicious with your own two hands. The answer is: a DIY fermentation kit offers the simplest and safest entry point for curious beginners who want to try food preservation at home.
I’ll admit—I was nervous the first time I tried fermenting cabbage for homemade sauerkraut. Would it mold? Smell terrible? Was I risking food poisoning? But with a basic fermentation kit, a clean glass jar, and a little salt, I ended up with the most crunchy, tangy, probiotic-packed sauerkraut I’d ever tasted. It’s this mix of science, tradition, and surprise that’s got me—and now thousands of others—hooked on DIY fermentation.
Whether you’re aiming to ferment veggies, kombucha, or even dosa batter with more confidence, this blog post will walk you through every important detail. We’ll break down the pros, cons, setup steps, tools, real stories, and risks—so you can start your fermentation journey with clarity and excitement, not confusion.
Let’s dive into how a simple, low-cost DIY fermentation kit can transform your kitchen, your gut health, and your sense of empowerment—especially if you’re just starting out in the world of home fermentation.
What is a DIY Fermentation Kit—and Why Should You Start With One?
The answer is: A DIY fermentation kit is a beginner-friendly collection of tools and components that helps you ferment foods safely at home. It usually includes a food-safe container, an airlock lid, weights to keep your food submerged, and simple instructions or salt conversion charts.
Why beginners love DIY fermentation kits:
- Safety First: They help create the right environment (anaerobic) to prevent spoilage and mold.
- Cost-Effective: You can start with under ₹800 using upcycled jars and budget tools.
- Low Risk: No need for fancy equipment. A mason jar and airlock go a long way.
- Easy to Use: Most kits require only 1–2 hours to set up. Some are even dishwasher-safe.
- Customizable: You can adjust ingredients, spice levels, and brine strength.
A friend of mine, Rina from Pune, started fermenting carrots and garlic during lockdown. She used an upcycled mason jar with a basic grommet and airlock system. Within days, her family was hooked on the tangy results—and her skin allergies began improving, thanks to the gut-friendly probiotics.
Popular components found in most kits:
| Component | Purpose |
|---|---|
| Food-safe Jar | Holds the veggies or liquid during fermentation |
| Airlock Lid | Releases gas while preventing air entry |
| Glass/Ceramic Weight | Keeps ingredients submerged |
| Salt (often Himalayan) | Creates the brine to preserve food |
| Instructions/Conversion Charts | Guides for salt ratios and timing |
Even if you’ve never boiled a pickle before, a DIY fermentation kit makes it almost foolproof to begin.
How to Set Up Your DIY Fermentation Kit (Step-by-Step)
The answer is: You can assemble your own fermentation kit in 5 simple steps using basic kitchen supplies or an off-the-shelf starter pack. Here’s how.
Step-by-Step Setup for Beginners:
- Choose a Fermentation Vessel
- Ideal: Wide-mouth glass jar (1-liter or more)
- Budget-friendly: Food-grade plastic bucket with a tight-fitting lid
- Install the Airlock
- Drill a hole in the lid.
- Insert a rubber grommet.
- Push the airlock valve into the grommet.
- Result: CO₂ escapes, oxygen stays out.
- Submerge the Ingredients
- Use a glass weight or spring (like Pickle Helix) to keep veggies below the brine.
- This prevents mold.
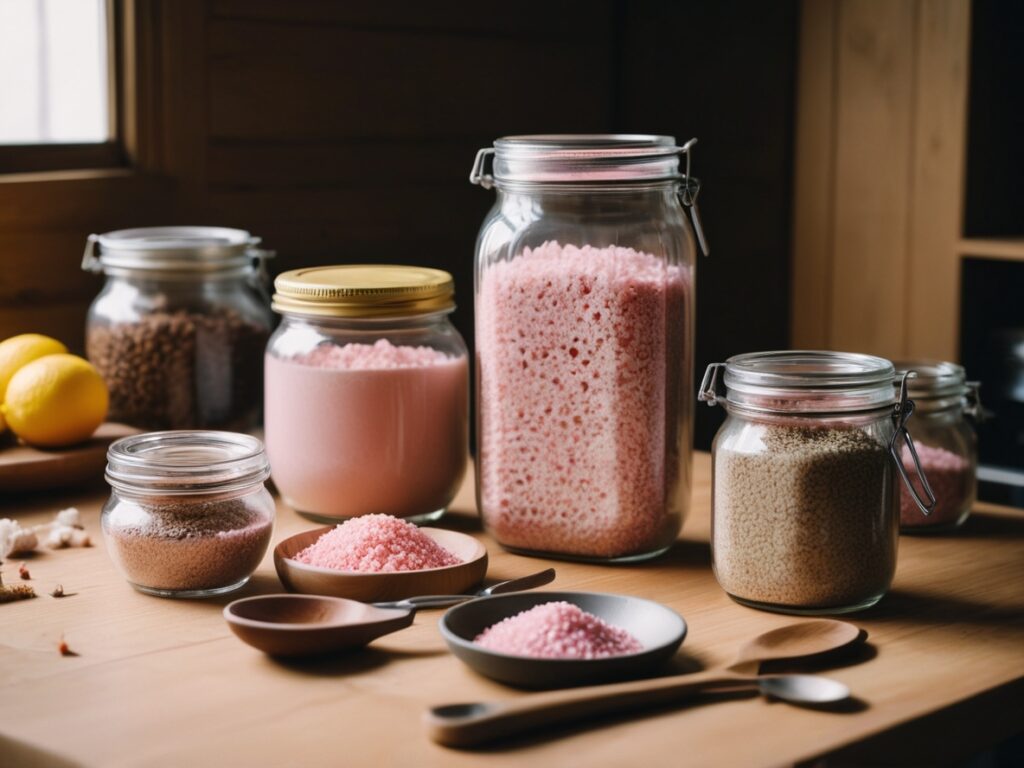
- Make the Brine
- Standard ratio: 2–3% salt by weight of water
- Use pink Himalayan salt if possible
- Pro Tip: Kits often include conversion charts for grams/liters.
- Manage Temperature
- Most ferments thrive at 18°C–22°C.
- For consistent results, use a modified fridge or insulated box.
Pro Tip from Experience:
When I first made kanji (fermented carrot drink), I didn’t use an airlock. The bottle leaked and made a mess. After switching to a proper lid with venting, I never had the issue again—and the flavor improved!
A basic setup costs under ₹1,000 and can be assembled in under 2 hours. For larger or seasonal batches (like mango pickles), you can scale up to fermentation chambers with thermostats.
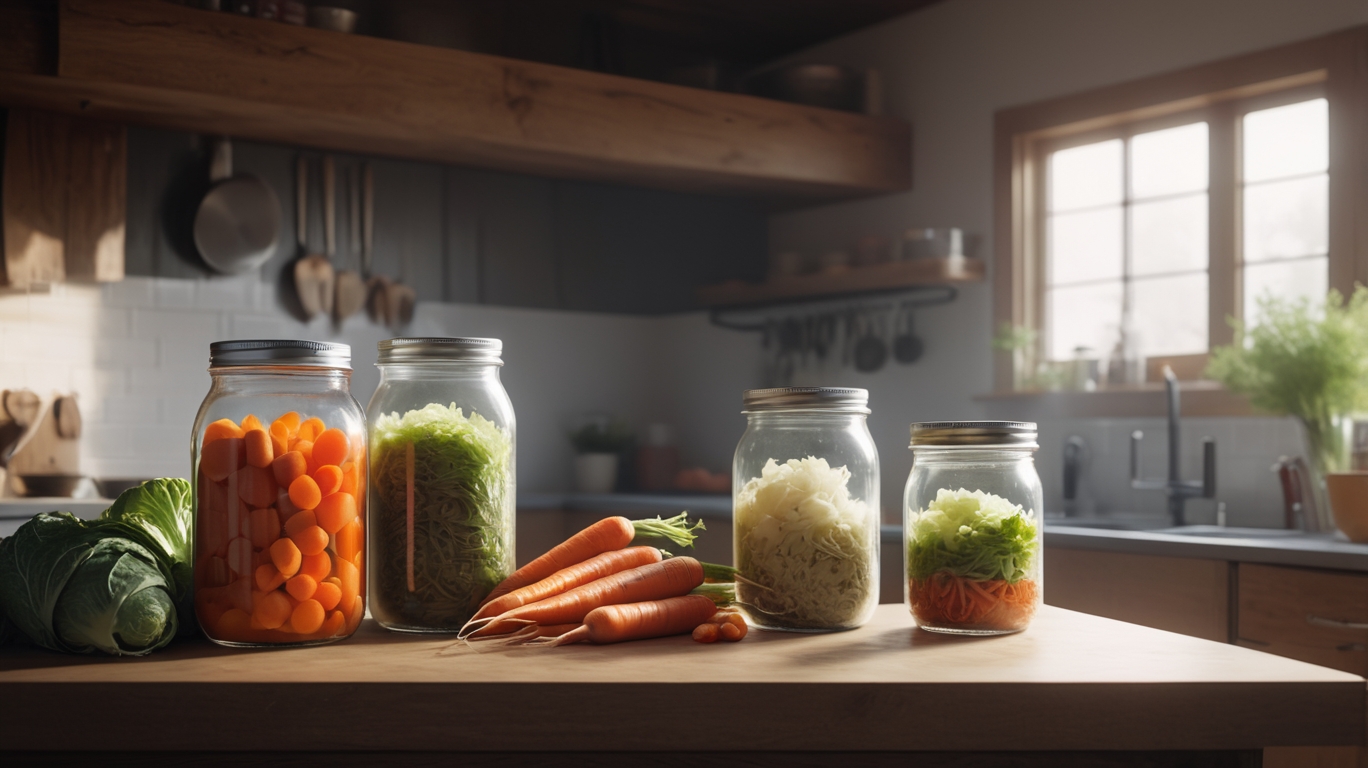
What Can You Ferment with a DIY Kit? (Popular Indian and Global Recipes)
The answer is: You can ferment a wide range of foods and drinks—everything from traditional Indian recipes to international favorites—using a simple fermentation kit.
Indian Favorites:
- Kanji – Carrot-based probiotic drink
- Homemade pickles – Mango, lemon, garlic
- Dosa/idli batter – Achieves better texture with temperature control
- Curd – With better probiotic richness using ceramic jars
Global Ideas to Try:
- Sauerkraut – Shredded cabbage with salt
- Kimchi – Spicy fermented napa cabbage
- Kombucha – Fermented tea using SCOBY
- Kefir – Yogurt-like fermented milk drink
Personal Win:
After trying sauerkraut using store instructions and failing twice, I used a proper weight and airlock combo. The kraut came out crisp, not soggy—and has become my go-to snack.
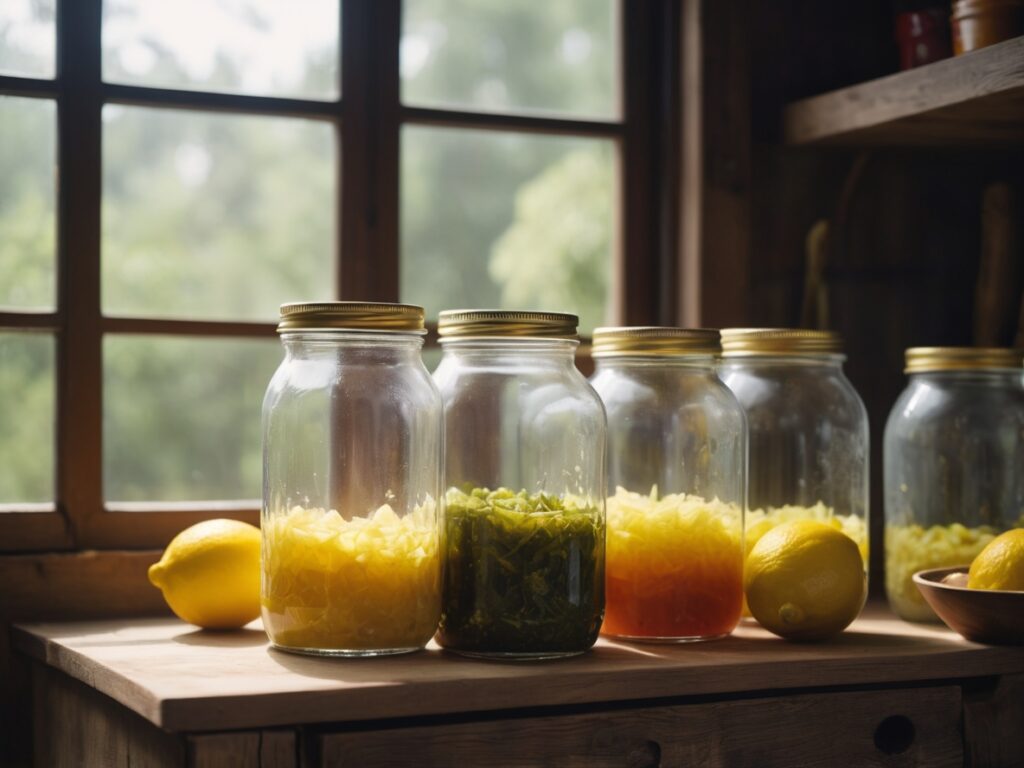
Starter Recipes for Beginners:
| Recipe | Days to Ferment | Key Ingredients |
|---|---|---|
| Carrot Kanji | 4–5 days | Carrots, mustard, water |
| Mango Pickle | 7–10 days | Mango, salt, spices |
| Sauerkraut | 5–7 days | Cabbage, salt |
| Beet Kvass | 3–4 days | Beets, water, salt |
With a basic DIY kit, you can experiment easily without worrying about spoilage or failed batches.
Are DIY Fermentation Kits Safe? Understanding the Risks and How to Prevent Them
The answer is: Yes—DIY fermentation is safe when you follow basic hygiene and fermentation principles. Kits are designed to reduce risk, but you still need to be careful.
Common Risks & Easy Fixes:
| Problem | Cause | Solution |
|---|---|---|
| Mold on top | Ingredients not submerged | Use weights to press them down |
| Cloudy brine | Natural fermentation process | Safe—unless it smells rotten |
| Bad odor | Contaminated jar or too little salt | Sterilize, check salt ratios |
| Leaking lids | Poor seal or missing gasket | Use BPA-free, leakproof lids |
EEAT Tip:
Online fermentation forums like Reddit’s r/fermentation or blogs like “MakeSauerkraut” offer tested advice. Most of my early troubleshooting was guided by community feedback and YouTube experiments by creators like TheBruSho.
Safety Tips:
- Use food-grade containers only (avoid reused takeaway boxes).
- Wash your hands and tools thoroughly before starting.
- Stick to trusted ratios (2–3% salt by weight).
- Don’t eat anything that smells putrid or looks slimy.
Fermentation is an anaerobic process—that’s why the airlock is key. Keep air out, gas in, and you’ll almost never face issues.
Should You Buy a Kit or Assemble One Yourself?
The answer is: If you’re a first-timer, start with a basic DIY fermentation kit. If you love tinkering or want to save money, assembling your own is a rewarding (and cheaper) route.
Buy a Ready-Made Kit When:
- You want everything in one box
- You’re nervous about contamination
- You’re short on time or tools
Top Kits (2025 India Market):
| Brand | Price (₹) | Features |
|---|---|---|
| Fermentools | ~₹1,800 | Airlock, weights, charts, video guide |
| Kilner Kit | ~₹2,200 | Glass jar, lid, vent, recipe book |
| Upcycled DIY | ~₹500–800 | Jar, grommet, lid, own ingredients |
Build Your Own When:
- You already own jars or brewing gear
- You enjoy customization
- You’re fermenting unusual shapes or ingredients
Pro Example: Arvind from Hyderabad shared on a Reddit thread how he built a custom 5L fermentation bucket for ₹600 using parts from a local hardware store. It now produces 3 different ferments weekly for his family of four.
Whether you buy or build, the key is cleanliness, submersion, and an airlock.
Fermentation as a Lifestyle: How One Simple Kit Can Change Your Health
The answer is: DIY fermentation can improve digestion, immunity, and even mental clarity—and it starts with one jar.
Reported Benefits:
- Improved Gut Health: Fermented foods feed beneficial bacteria.
- Better Digestion: Natural enzymes break down foods.
- Boosted Immunity: A balanced microbiome supports the immune system.
- Cost Savings: Home ferments are 70% cheaper than store-bought versions.
- Sustainability: Reduce food waste by fermenting leftovers or garden produce.
Real Story:
My aunt began fermenting beet kvass to deal with bloating. She noticed a difference in 3 weeks, and now the whole family drinks it twice a week. Her only investment? A ₹200 glass jar and a pinch of pink salt.
Mindful Eating:
Fermentation slows you down. It’s not about instant gratification—it’s about connection. With food, with tradition, and with wellness.
Even kids can join in—watching bubbles form, testing flavors, and learning kitchen science firsthand.
Conclusion: Your Next Step Into the Fermentation World
Fermentation may seem intimidating—but once you have the right setup, it’s simple, safe, and addictive in the best way. A DIY fermentation kit bridges that gap between curiosity and action. It allows you to experiment without fear, preserve with confidence, and eat with joy.
Let’s recap your fermentation game plan:
- ✅ Start with a clean, wide-mouth jar and airlock system
- ✅ Follow salt ratio charts (2–3%) for safety
- ✅ Use weights to keep ingredients submerged
- ✅ Try easy recipes like kanji or sauerkraut
- ✅ Refer to community wisdom and trusted blogs
- ✅ Upgrade as your confidence grows
In 2025, homemade fermentation isn’t just a trend—it’s a tool for health empowerment, sustainability, and creativity. Whether you’re making probiotic kanji for your family or pickled beets to impress friends, it all begins with one jar, one recipe, and a little curiosity.
So, are you ready to open the lid on your first home ferment? Your gut (and tastebuds) will thank you.