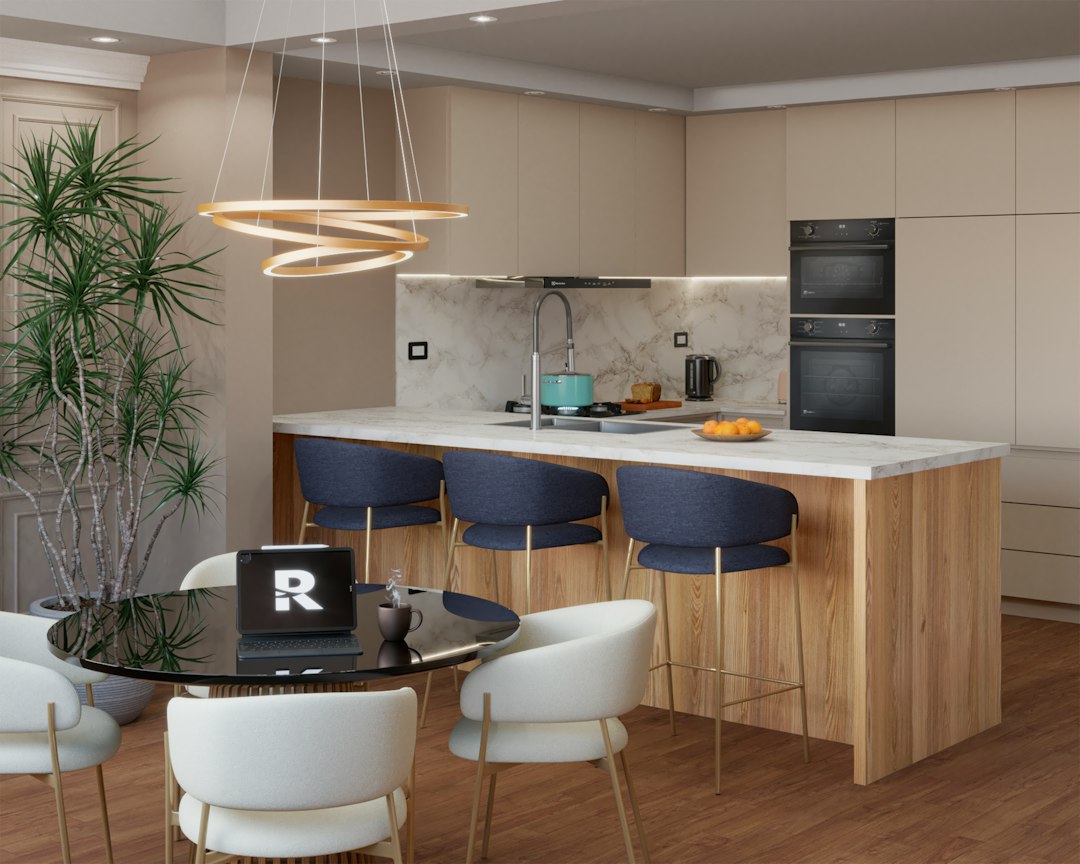
A kitchen island in a compact home often feels like a paradox. Standard interior design advice treats islands as luxury centerpieces reserved for sprawling open-concept floor plans. Yet, when square footage is tight, a well-planned multi-functional kitchen island is not a space-waster—it is the single hardest-working fixture you can introduce.
Instead of merely providing extra counter space, a multi-purpose island serves as a dynamic hub: a food prep station by morning, a homework and laptop workspace by afternoon, an intimate dining table by evening, and a high-density storage vault 24/7. Achieving this level of utility requires looking beyond aesthetic trends and engineering every square inch for dual or triple capability.
Key Takeaway: A successful small-space island must fulfill at least two functional needs beyond basic food prep—such as integrated dining, hidden appliance housing, or deep storage—without compromising walking clearances.
1. Nailing the Dimensions: Clearances and Proportions
The most common mistake when adding an island to a smaller footprint is sacrificing circulation. An island that blocks the dishwasher door, pinches traffic lanes, or obstructs the kitchen work triangle (the path between sink, fridge, and stove) will frustrate you daily, no matter how stylish it looks.
The Golden Rules of Clearance Zones
Before buying materials or ordering cabinetry, you must account for human movement and appliance swings:
- Minimum walkway clearance: Aim for 36 inches (91 cm) between the island edge and surrounding cabinets or walls. For primary cook zones where two people might pass each other, 42 inches is ideal.
- Appliance clearance: Measure the full swing of your refrigerator doors, oven door, and dishwasher. Ensure there is at least 10 to 12 inches of clearance remaining when those doors are fully open.
- Island scale: In a modest kitchen, an island rarely needs to exceed 24 to 30 inches in depth. Standard base cabinets are 24 inches deep, but narrow 18-inch or 21-inch profiles can yield massive functional improvements while preserving floor space.
According to workspace design recommendations documented by This Old House, keeping a minimum perimeter of 36 inches guarantees safe movement around hot cookware and open flames.
Choosing the Right Island Height
Standard counter height is 36 inches, which provides an ergonomic baseline for chopping, mixing, and baking. However, if your multi-functional kitchen island is also your primary dining table, you have two options:
- Single-Level Counter Height (36 inches): Keeps sightlines open in small rooms and provides a massive, uninterrupted surface for rolling dough or spreading out projects. Requires 24-inch counter stools.
- Tiered Multi-Level Surface (36-inch prep / 42-inch bar): Elevates the casual dining side to 42 inches. This configuration visually hides food prep clutter from the living area and creates clear separation between cook and guest zones.
2. Layering Functionality: Prep, Dining, and Storage
To maximize efficiency, treat the base, countertop, and vertical airspace of your island as three distinct functional zones.
Dynamic Storage That Eliminates Clutter
Standard cabinet shelving frequently leads to forgotten items lost in dark corners. Instead, outfit the base of your multi-functional kitchen island with specialized storage solutions:
- Deep full-extension drawers: Far more efficient than lower cabinets with doors. Deep drawers store heavy cast iron pans, mixing bowls, and stand mixers with zero bending or digging.
- Side-panel shallow shelving: The narrow ends of an island (typically 24 to 30 inches wide) are prime real estate for 4-to-6-inch-deep spice racks, cutting board cubbies, or cookbook displays.
- Dual-sided access: If your island is at least 30 inches deep, install shallow cabinets opening toward the dining/living side for entertaining ware, seasonal linens, or board games, keeping daily cookware on the kitchen-facing side.
Pairing these built-ins with smart small kitchen storage hacks allows you to completely clear primary perimeter counters of visual clutter.
The Hidden Dining Nook
Fitting a separate kitchen table into a small home often consumes valuable square footage. Integrating seating directly into the island preserves floor space while maintaining a social atmosphere.
To design comfortable seating into a compact island:
- Cantilevered Overhangs: A countertop overhang of 10 to 12 inches provides enough knee clearance for comfortable counter-height seating. If extending beyond 10 inches with quartz or granite, install hidden steel support brackets underneath to prevent tipping or cracking.
- Backless, Tuck-Under Stools: Choose sleek, backless counter stools that slide entirely beneath the overhang when not in use. This maintains clear 36-inch walkways during heavy cooking sessions.
- Drop-Leaf Countertop Extensions: For ultra-compact spaces, a hinged butcher-block leaf raised on heavy-duty folding brackets can provide a two-person dining surface during meal times and fold flat against the island base when prep space is needed.
Built-In Power and Utility Integration
An island that functions as a remote workstation or appliance hub requires integrated power. Running electrical wiring into an island elevates its utility dramatically:
- Pop-up electrical outlets: Flush-mounted outlets with USB ports installed directly into the countertop keep cords neat while powering blenders, slow cookers, or laptops.
- Microwave drawer: Relocating the microwave from upper cabinetry or precious perimeter counters down into the island base creates clean visual lines and streamlines meal prep.
- Pull-out waste and recycling bins: Integrating dual bins into an 18-inch island cabinet drawer keeps unpleasant trash cans out of sight in open-plan spaces.
Design Pro Tip: If you are remodeling on a budget and cannot trench electrical lines through concrete slabs or subfloors, consider a heavy-duty butcher block cart with locking casters that plugs into a wall outlet when parked near the perimeter.
3. Selecting Durable, Dual-Purpose Materials
In a small home, island surfaces endure constant wear. The materials you select must withstand chopping, hot dishes, beverage spills, and laptop friction without demanding high-maintenance care.
Countertop Combinations
You do not need to match your island countertop to your perimeter counters. In fact, contrasting materials can define zones visually:
- End-grain butcher block: Perfect for serious home cooks. It acts as one continuous cutting surface, warming up the room's aesthetic. It requires occasional food-grade mineral oil applications but ages gracefully.
- Engineered quartz: Non-porous, stain-resistant, and scratch-resistant. Quartz handles wine spills, citrus acids, and hot coffee mugs with minimal effort, making it ideal for high-traffic dining islands.
- Mixed-surface tops: Combine a 2/3 quartz prep zone with a 1/3 raised or lowered wood dining ledge to establish tactile boundaries between cooking and relaxing.
Mobile vs. Fixed Islands for Tight Footprints
If your room clearance sits right at the borderline of 32 to 36 inches, a permanently anchored island might make the space feel constricted. Consider whether a modular approach fits better:
- Stationary Island: Best for plumbing and electrical integration, high structural stability, and maximum cabinet storage.
- Rolling Workstation on Industrial Casters: Best for long, narrow galley kitchens. Look for non-marking polyurethane locking wheels. A rolling island can be pushed against a wall when entertaining larger groups or rolled directly beside the range during intensive baking projects.
Adopting modular furniture is a foundational step when decluttering kitchen countertops and reclaiming usable living area.
4. Planning Your Island: Practical Step-by-Step Blueprint
Ready to bring a multi-functional kitchen island into your home? Follow this logical workflow to avoid costly sizing errors:
- Map the Circulation Paths: Use blue painter's tape on your kitchen floor to outline the exact perimeter of your proposed island. Leave the tape in place for 48 hours to test whether you bump into corners during daily routines.
- Audit Your Daily Workflow: Write down your primary kitchen bottleneck. Do you lack dry pantry storage? Do you lack prep space? Do you need a place for quick breakfasts? Build your island features around solving that specific problem first.
- Select the Base Architecture: Determine if you will use stock base cabinets (such as two 15-inch drawer bases placed back-to-back), a custom furniture-style build, or an upcycled vintage dresser sealed with water-resistant polyurethane.
- Incorporate Lighting: An island needs dedicated illumination. Install a pair of mini-pendants on a dimmer switch, or add directional recessed ceiling spots centered directly over the workstation.
Take Action Today
Grab a roll of blue painter's tape and a tape measure right now. Measure a 24-by-48-inch rectangle in the center of your kitchen floor. Walk your typical path from the refrigerator to the sink and open every nearby cabinet door. This simple 5-minute visual test will immediately show you if your layout can support a fixed multi-functional kitchen island or if a mobile, drop-leaf design is your ideal solution.

Written by
Nibedita Basu
English graduate and social worker with a passion for creating a warm, happy, and meaningful life. I write about Home, Food, and Pets — sharing practical ideas, everyday inspiration, and simple joys that make life more comfortable, wholesome, and fulfilling.